Learn how to easily enable or disable Secure Sign-In for Windows 10. Enhance your computer’s security or speed up login.
How to Enable or Disable Secure Sign-In for Windows 10
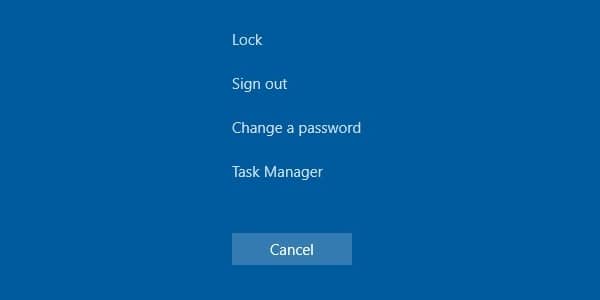
If you’re a Windows 10 user, you might have come across the Secure Sign-In feature. It’s designed to provide an extra layer of security by requiring you to press Ctrl+Alt+Delete before signing in. This simple action can prevent unauthorized access and keep your computer safe. But, if you find it a bit of a hassle, you can easily disable it. In this post, we’ll walk you through the steps to enable or disable Secure Sign-In for Windows 10. It’s easier than you think!
What is Secure Sign-In and Why Use It?
Secure Sign-In for Windows 10 adds an extra step to your login process. It might seem like a small inconvenience, but it helps to ensure that your login screen isn’t being spoofed by malicious software. By pressing Ctrl+Alt+Delete, you’re ensuring that the login screen you’re seeing is legitimate and provided by Windows. This can be particularly useful if you share your computer with others or use it in a public place.

Enabling Secure Sign-In: A Step-by-Step Guide
- Open the Run Dialog Box
To get started, press the Windows key + R on your keyboard to open the Run dialog box. You’ll see a small window pop up. - Type in
netplwizand Press Enter
In the Run dialog box, typenetplwizand hit Enter. This command will open the User Accounts window.

- Navigate to the Advanced Tab
Once the User Accounts window is open, you’ll see several tabs at the top. Click on the one labeled Advanced. - Enable Secure Sign-In
Under the Advanced tab, you’ll find a section called Secure Sign-In. Check the box that says “Require users to press Ctrl+Alt+Delete.” Click Apply and then OK to save your changes. Congratulations, you’ve just enabled Secure Sign-In for Windows 10!
Disabling Secure Sign-In: Quick and Easy Steps
- Open the Run Dialog Box
Just like before, press the Windows key + R to open the Run dialog box. This is your shortcut to accessing various settings in Windows. - Type in
netplwizand Press Enter
In the Run dialog box, typenetplwizand hit Enter. The User Accounts window will open again. - Navigate to the Advanced Tab
Click on the Advanced tab at the top of the User Accounts window. This is where you’ll find the settings for Secure Sign-In.

4. Disable Secure Sign-In
Uncheck the box that says “Require users to press Ctrl+Alt+Delete.” Click Apply and then OK to save your changes. You’ve now disabled Secure Sign-In for Windows 10, making your login process a bit faster.
Benefits of Using Secure Sign-In
Using Secure Sign-In for Windows 10 has several advantages. First and foremost, it adds an extra layer of security to your computer. This is especially important if you use your computer in a shared or public environment. By pressing Ctrl+Alt+Delete, you’re ensuring that the login screen you see is legitimate and not a spoof created by malware.
Another benefit is peace of mind. Knowing that your computer has an additional security measure can make you feel more comfortable and confident when using your device. Plus, it’s a quick and easy step to add to your login routine.

When to Disable Secure Sign-In
While Secure Sign-In adds an extra layer of security, there are times when you might want to disable it. If you’re the only one using your computer and it’s in a secure location, you might find the extra step unnecessary. Disabling Secure Sign-In can make your login process faster and more convenient.
Another reason to disable Secure Sign-In is if you’re using your computer for gaming or other activities that require frequent logins. In such cases, the additional step can become a bit of a hassle.
Frequently Asked Questions
Q: Is Secure Sign-In necessary for all Windows 10 users?
A: No, Secure Sign-In is not necessary for everyone. It’s particularly useful for those who share their computers or use them in public places. If you’re the only one using your computer and it’s in a secure location, you might not need this feature.
Q: Does Secure Sign-In slow down my computer?
A: Secure Sign-In does not slow down your computer. It simply adds an extra step to the login process to ensure security.
Q: Can I enable or disable Secure Sign-In whenever I want?
A: Yes, you can enable or disable Secure Sign-In at any time by following the steps outlined in this post. It’s a quick and easy process.
Conclusion
Secure Sign-In for Windows 10 is a simple but effective way to enhance the security of your computer. By requiring you to press Ctrl+Alt+Delete before signing in, it ensures that the login screen you see is legitimate. Whether you choose to enable or disable this feature depends on your personal needs and preferences. If you’re looking for an extra layer of security, enabling Secure Sign-In is a great choice. But if you prefer a faster login process, disabling it is just as easy. Either way, you’re in control of your computer’s security.
In the end, it’s all about finding the right balance between security and convenience. With the steps outlined in this post, you can easily enable or disable Secure Sign-In for Windows 10 and tailor your login process to suit your needs. Happy computing!
